02
3D Printing:
Test Printing with PLA
~ 26.01.2025
A 3D Printer
Before I start this week's main task, which is test printing on a 3D printer to see if my 50 dollars wasn't a waste, here is an overview of the 3D printing process.
-
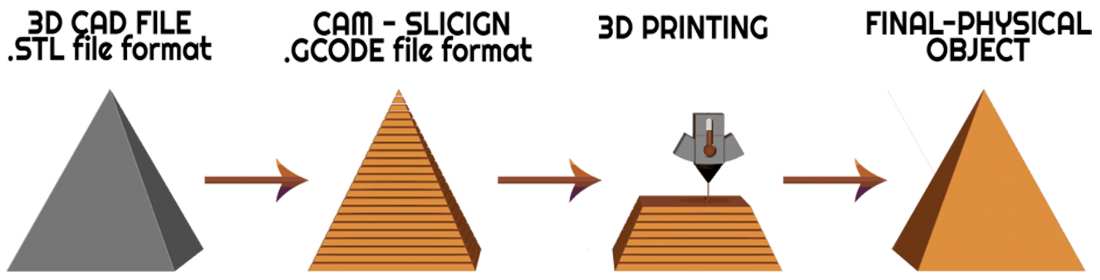
Overview of the 3D printing process
-
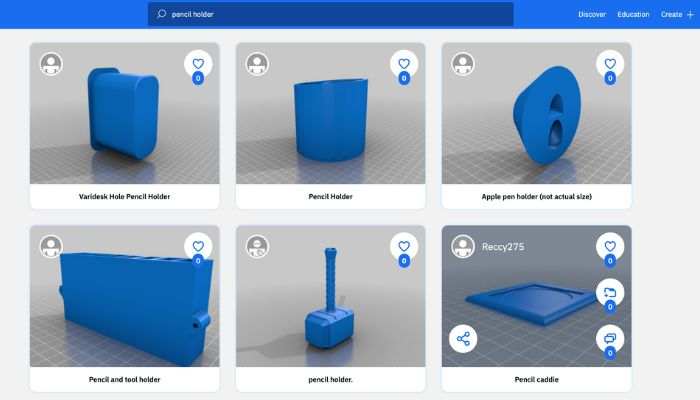
Free models on Thingiverse
-
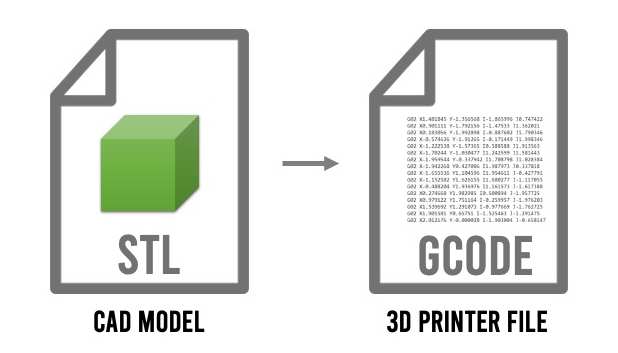
STL file to g-code
First, we would need a 3D model. Popular platforms, such as Thingiverse, has a wide range of designs and free models for test printing. For beginners like myself, test cubes are usually recommended for initial prints due to their straightforward geometry and lack of need for supports. Models are typically provided in the STL format, the most widely supported file type for 3D printing software.
Once the STL file of the 3D model is ready, we can move on to slicing, which is converting a 3D model into a series of layers that the printer can read. This will generate a G-Code file, which contains the detailed instructions for the printer to produce the object. While the G-Code itself may appear complex, a detailed understanding is generally unnecessary for most users.
-
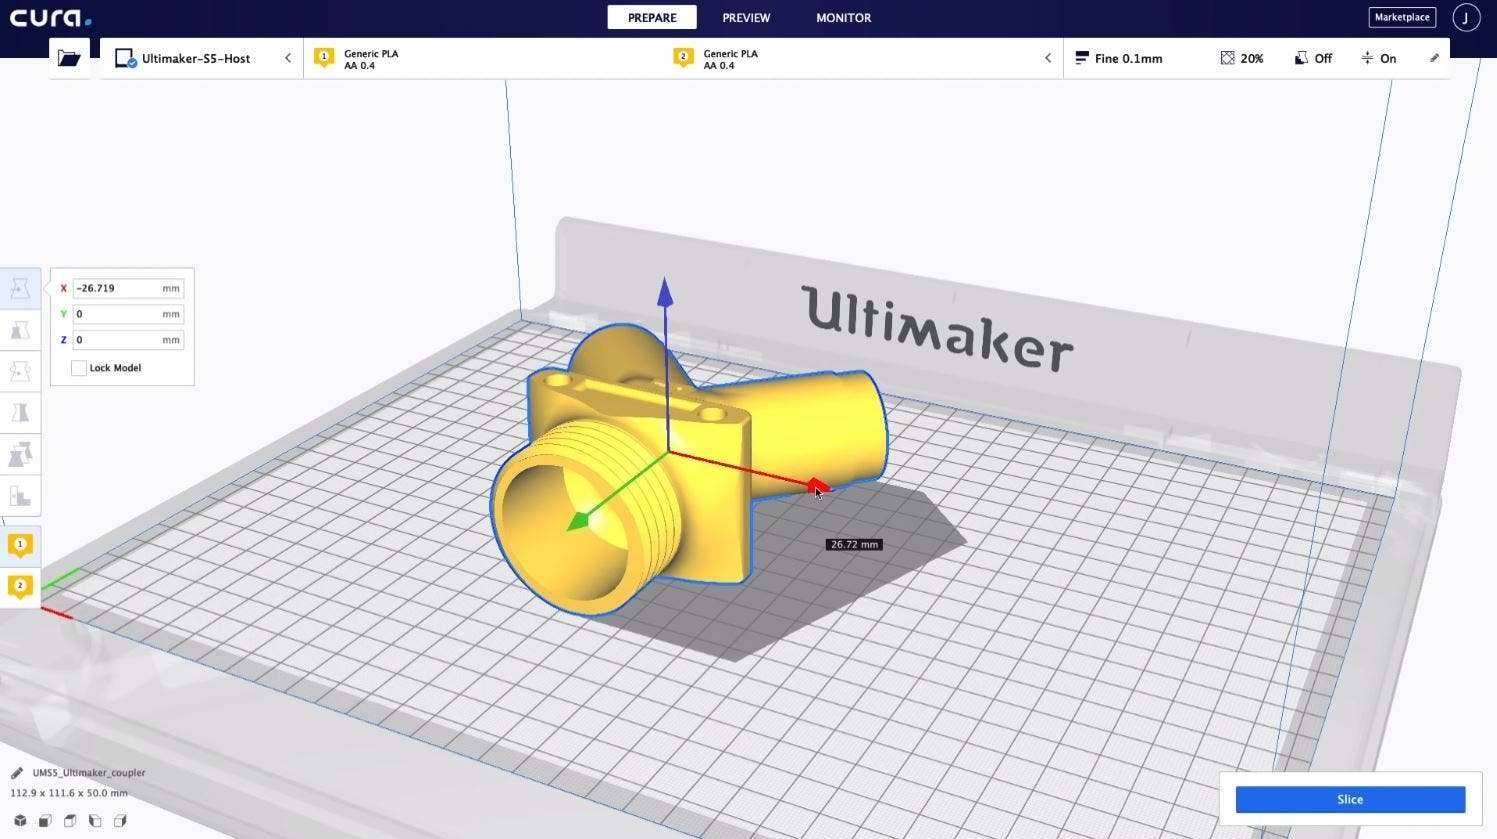
Screenshot of Cura
There are various slicing software options available. I will be using Cura, which is widely regarded as a versatile choice, with a beginner-friendly "Recommended Mode" that simplifies the setup depending on the model of the printer by providing the essential settings like layer height, infill percentage, support structures, and adhesion. Its compatible with most printers and has an extensive community.
Once a model has been sliced and the G-Code file generated, it is transferred to the printer, typically using a flash drive or SD card. The printer uses this file to guide the printing process. Calibration of the printer prior to printing is important for accuracy and quality, and this is often achieved using standard calibration procedures.
-
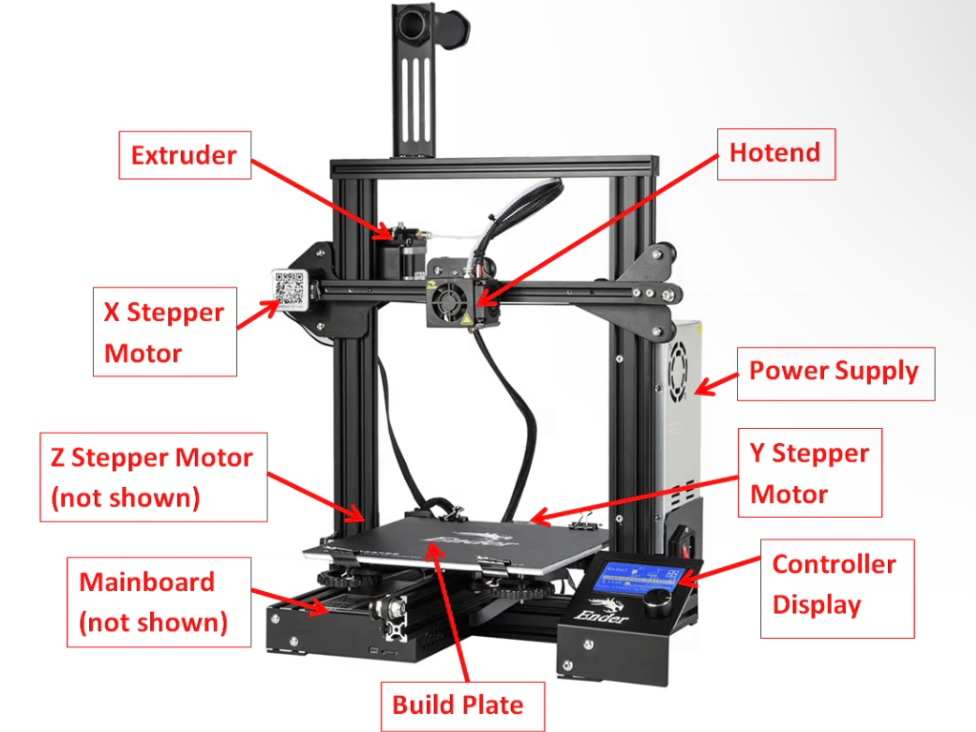
Overview of a typical 3D printer
Here is an overview of a typical 3D printer.
- Hotend: The nozzle responsible for melting the plastic filament for printing.
- Extruder: A motorised assembly with gears that feeds the filament into the hotend.
- Print Bed: The platform where the 3D object is formed layer by layer. XYZ Stepper Motors: Motors that control the movement of the hotend in the X, Y, and Z directions to shape the printed object.
- Controller Board: A compact computer that interprets the G-Code file and manages the printer's operations to create the object.
- Controller Display: An LCD screen that displays information and feedback from the controller board.
- Power Supply: A unit that converts household electricity into the appropriate power needed for the printer's components.
The Sunlu T3
-
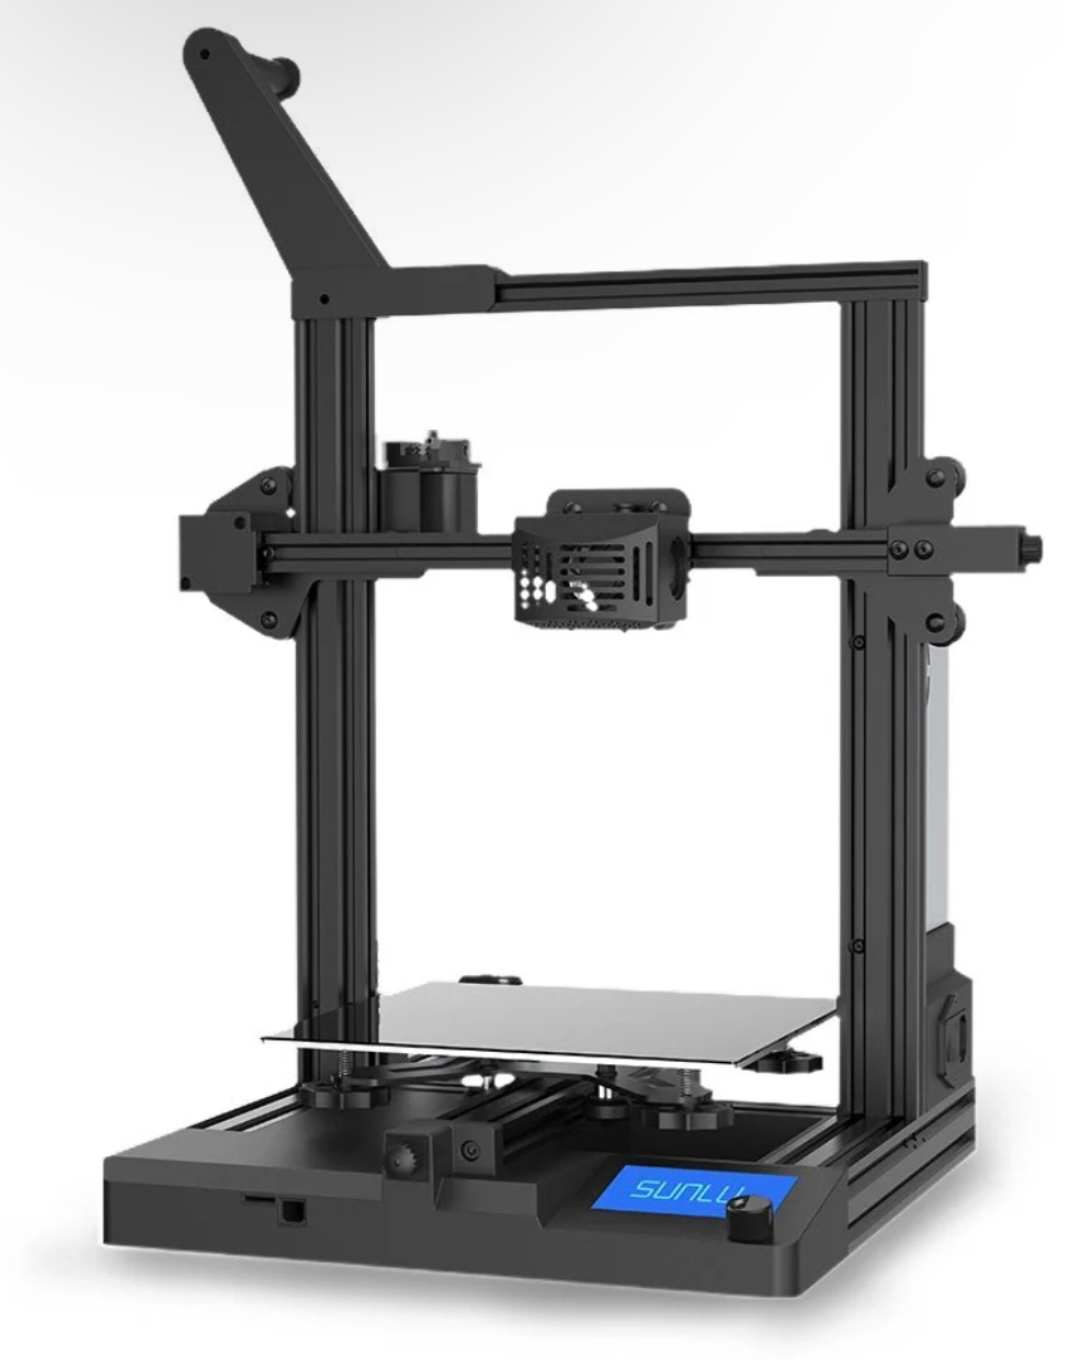
The Sunlu T3
-
Control panel on the Sunlu T3
-
Bed on the Sunlu T3
Here is an overview of the features and performance of the printer that I bought, which is a Sunlu T3.
| Aspect | Details |
|---|---|
| Print Speed | Maximum speed of 250mm/s. Fast Printing mode reduces time but may compromise quality, requiring fine-tuning for optimal results. |
| Build Volume | 220mm x 220mm x 250mm, suitable for hobbyists and professionals. |
| Auto-Leveling | 16-point intelligent leveling system for easy bed calibration. |
| Filament Management | Includes filament run-out and clog detection with automatic pausing for troubleshooting. |
| User Interface | Monochrome LCD with click-wheel interface. Positioned at the base, potentially obstructed during printing. |
| Design and Assembly | Partially assembled with simple setup. Features tensioning knobs for X and Y axes and an anodized aluminum extruder with a Bowden tube. |
| Performance | Standard mode delivers good quality. Fast Print mode reduces time to around 60% but may result in rougher finishes without calibration. |
| Conclusion | Affordable with useful features. Best for beginners willing to calibrate settings for better speed-to-quality balance. |
Filament
For the filament, we can use PLA, ABS, TPU, nylon, or even resin or metal. My criteria would be something easy to print, and relatively safe to use in a small space. So plastic would be better than something like resin. The most commonly used filament materials in 3D printing are PLA (Polylactic Acid) and ABS (Acrylonitrile Butadiene Styrene).
| Aspect | PLA (Polylactic Acid) | ABS (Acrylonitrile Butadiene Styrene) |
|---|---|---|
| Description | Biodegradable, plant-based plastic made from renewable resources. | Petroleum-based plastic known for toughness and durability. |
| Printing Temperature | 190–220°C | 230–250°C |
| Ease of Use | Easy to print; minimal warping; beginner-friendly. | More challenging; prone to warping; requires heated bed. |
| Finish | Glossy, smooth surface. | Matte, less smooth finish. |
| Odour | Mild, sweet smell during printing. | Strong fumes; good ventilation required. |
| Durability | Lower heat resistance and durability. | High impact resistance and durability. |
| Applications | Prototypes, decorative objects, and low-stress parts. | Functional parts, mechanical components, and heat-resistant items. |
| Environmental | Biodegradable and eco-friendly. | Non-biodegradable; petroleum-based. |
| Cost | Generally cheaper. | Slightly more expensive. |
-
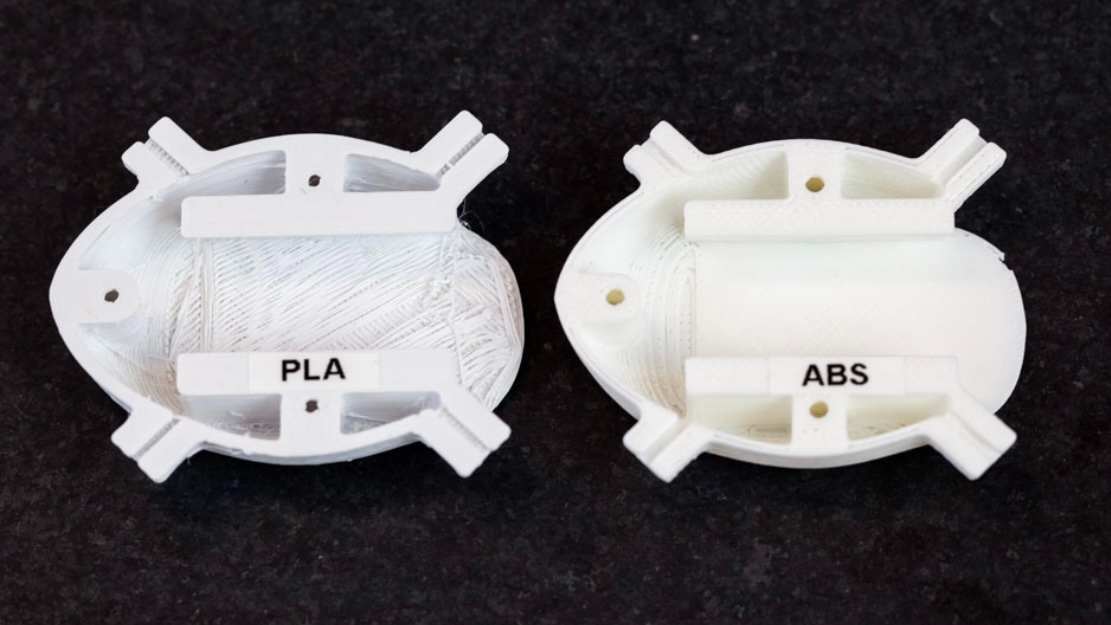
Comparison of details on prints with PLA and ABS
-
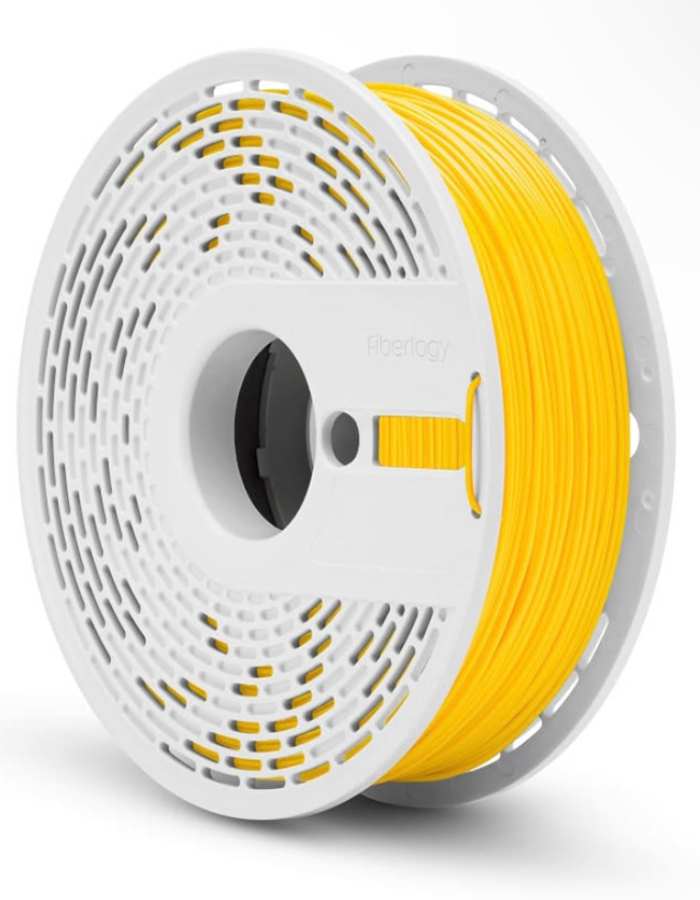
Yellow PLA filament
-
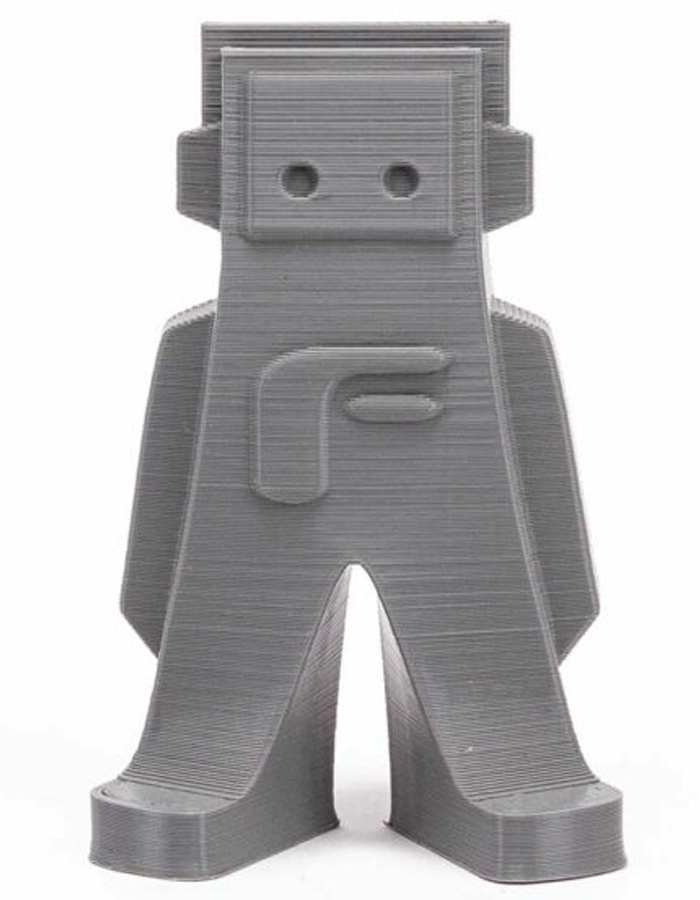
Example print with grey filament
I finally received my filament for the 3d printer. I chose grey PLA as the filament colour for this project. Based on my research, monochrome colours are typically preferred for test prints and prototypes because they make it easier to observe fine details.
Grey, in particular, provides excellent contrast without being too reflective (like white) or obscuring details in shadows (like black). While I plan to purchase other colours for future projects, grey was the most practical choice for evaluating the printer’s performance.
Test Printing
-
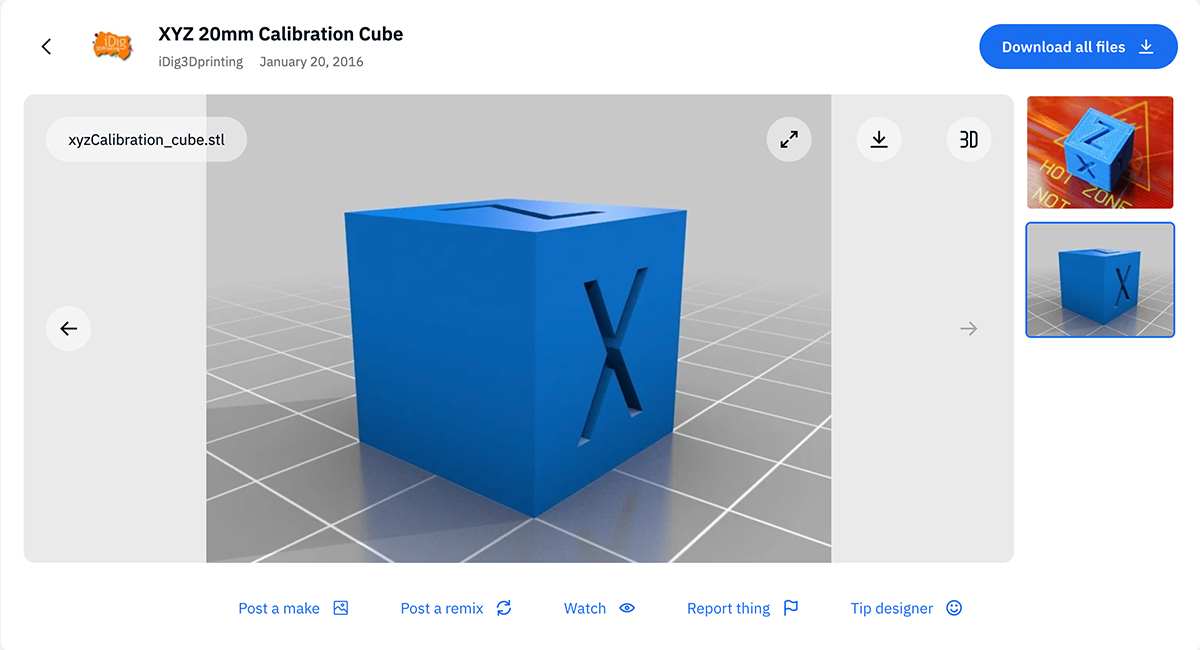
Calibration cube in Thingiverse
Image: s2w2 13
https://www.thingiverse.com/thing:1278865
For my test print, I downloaded an STL file of a test cube, which includes alphabets on its surfaces to evaluate how well the printer captures fine details. Link: https://www.thingiverse.com/thing:1278865.
For slicing, I selected Cura as the software. Although Cura didn’t have my specific 3D printer model (T3) listed, I found that the Ender 3 Pro shared similar settings and chose it as a reference.
-
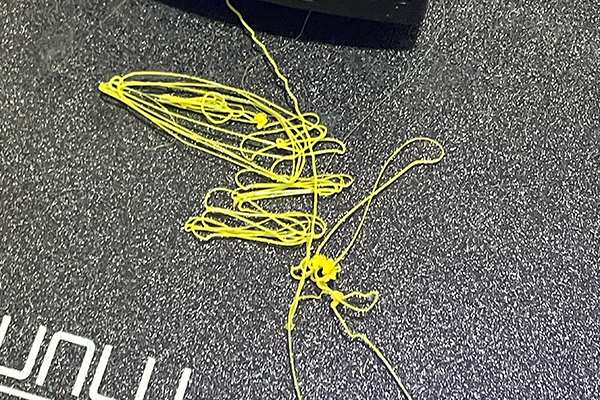
Excess filament
-
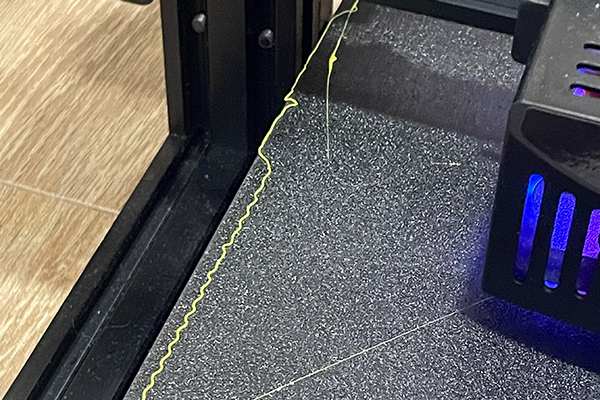
Incorrect bed level
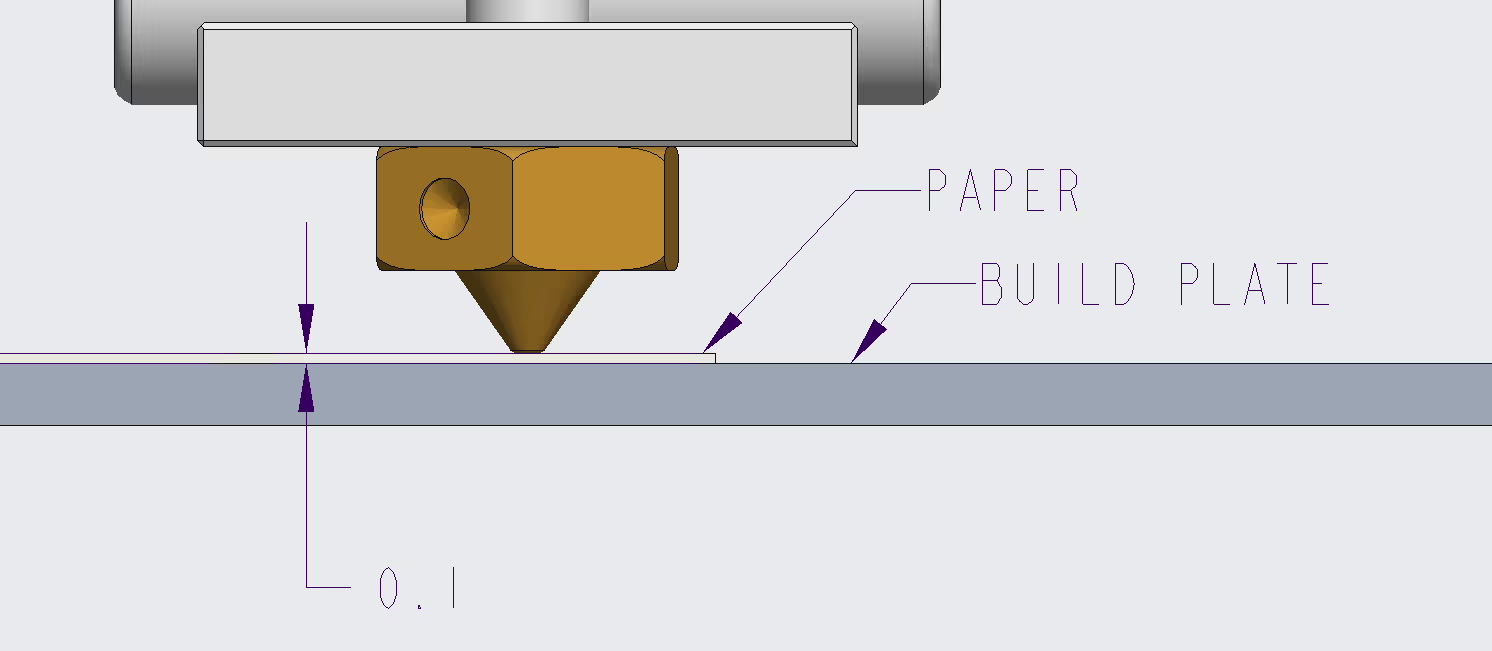
The first issue I encountered was that the filament wasn’t adhering properly to the print bed. Initially, I thought this was due to the bed temperature being too low. The recommended bed temperature for PLA is around 60°C, so I increased it by 40°C to 100°C. However, this adjustment didn’t resolve the problem, as the PLA still wouldn’t stick to the bed.
-
How to level printer bed
https://www.3dmakerengineering.com/blogs/3d-printing/bed-leveling-first-layer-thickness-and-z-offset
After researching potential causes, I discovered that bed leveling and the Z-axis nozzle position are the most common culprits for poor adhesion. Since the printer I purchased has an auto-leveling feature, I enabled it for this test print. For the Z-axis adjustment, I learned that I needed to modify the printer's software settings to disable certain safety measures that were preventing the nozzle from moving closer to the bed.
Instead of updating the software immediately, I decided to manually adjust the nozzle height based on my judgement. I also enabled adhesion settings in teh slicing software to ensure the filament would stick properly to the bed and selected support settings as needed for the test print.
-
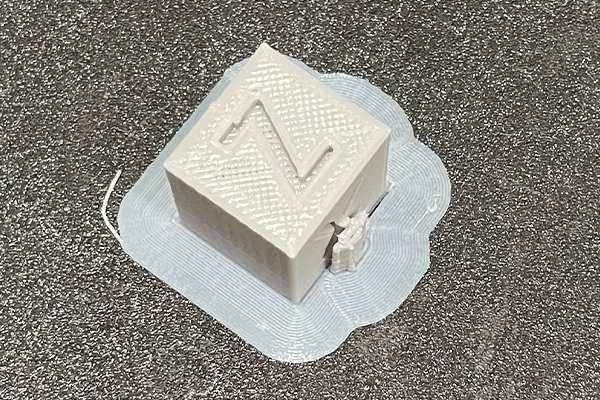
Printed with the correct bed level
Once I knew the nozzle was properly positioned close to the bed and the new GCode with the adjustments was ready, I reprinted the model. It significantly improved the filament’s adhesion. I think the main issue was the GCode itself and the nozzle being positioned too far from the bed.
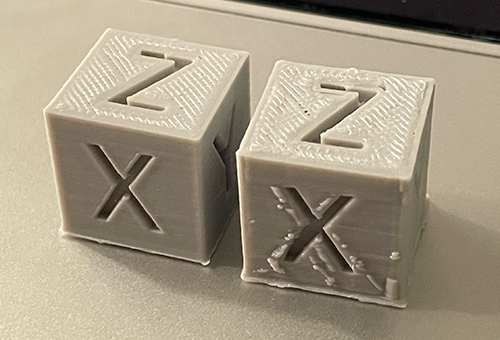
The outcome of my first print exceeded expectations for a budget 3D printer. The details were quite good, and while the letter "Z" on the top side was slightly rough, it still performed better than anticipated.
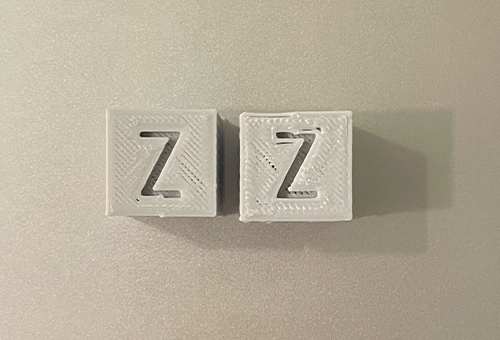
Next, I tested the T3’s Fast Printing mode. As mentioned above in the printer details chart, it was advertised as part of the T3’s beginner-friendly design. I enabled it to assess its usefulness for quick prints. While the print time wasn’t drastically reduced, it was cut to about 60% of the usual time, taking only 20 minutes to complete. The details were slightly rougher with this setting, but overall, the results were impressive given the significant time savings.
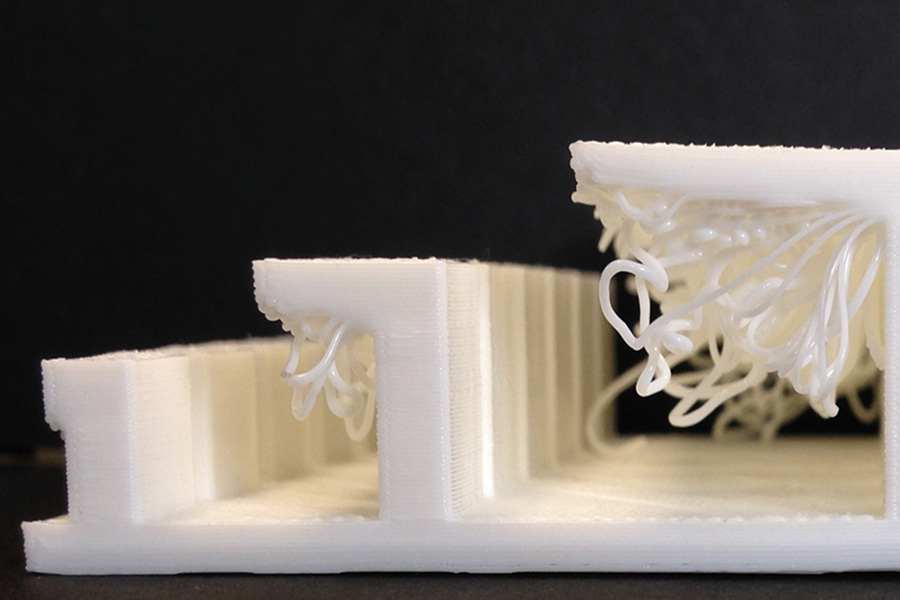
I decided to test print other objects, to calibrate the printer for certain objects. Now I know how san serif capital letters might look on a 3D printed serface, both vertical and horizontal. But can I test print something that I can use as reference for the actual interfaces? How would I place them and at what distance, and how would the overhangs be handled?
One thing I might need to consider before modelling and testing the interfaces is the size of the necessary components so that I don't have to reprint a model multiple times just to get them to fit perfectly. Even a few mms could make a difference in how the finishing looks. The first components to consider are the two displays(16x2 LCD and 3.5 inch OLED) and Arduino Uno.
-
Example of different overhangs
-
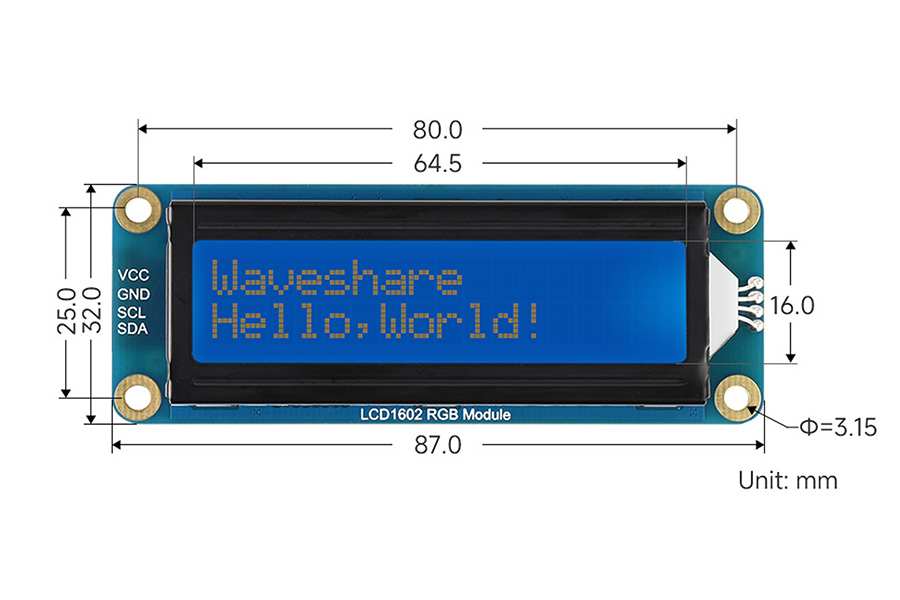
16x2 LCD display
-
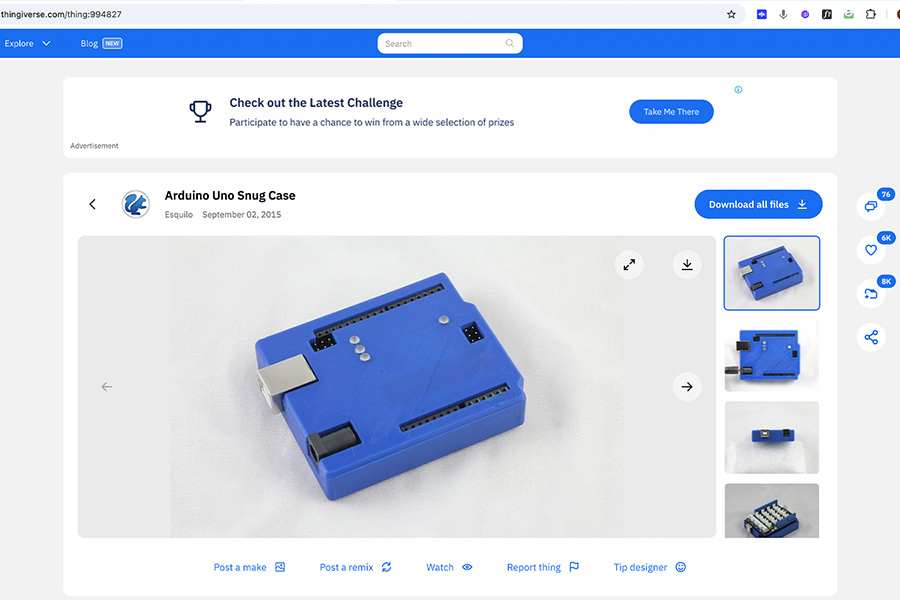
Arduino Uno snug case
I found a case for the Arduino on Thingiverse and decided to use it as a reference point to check the dimensions for my future interface. The print turned out well overall. The surface was slightly rough, but the bottom part—where the adhesive was applied—was much smoother.
On a side note, I noticed the supports were difficult to remove. Many people suggested printing without supports altogether, so I decided to do that. Also, to reduce the print time, I reduced the density in my file from 20% to 10% (typical recommendation is between 10% and 20%).
During the printing process,I monitored the print closely because, in fast printing mode, extruded pieces sometimes get caught on the nozzle, potentially damaging parts of the print. To prevent this, I cleaned up any extruding material during the printing process.
-
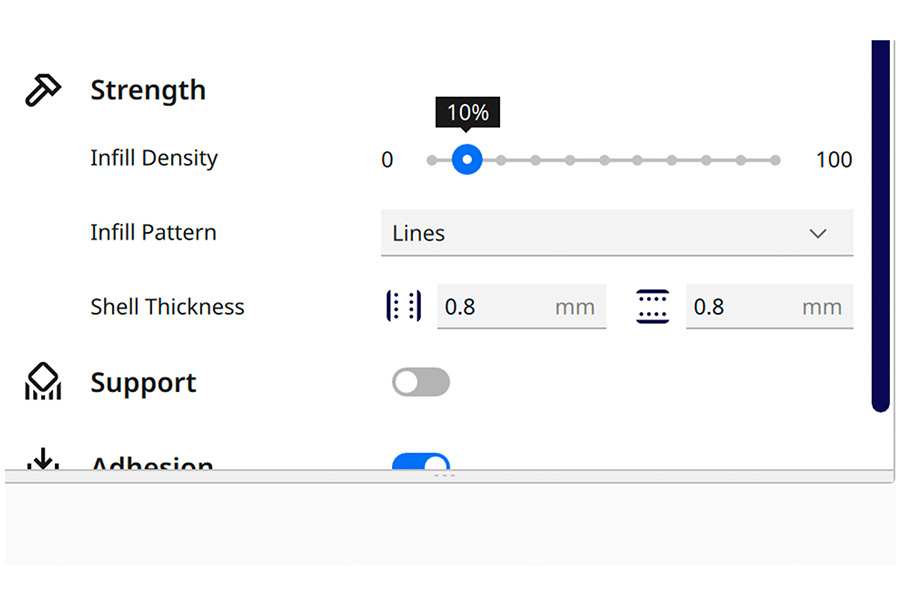
Infill density settings in Cura
-
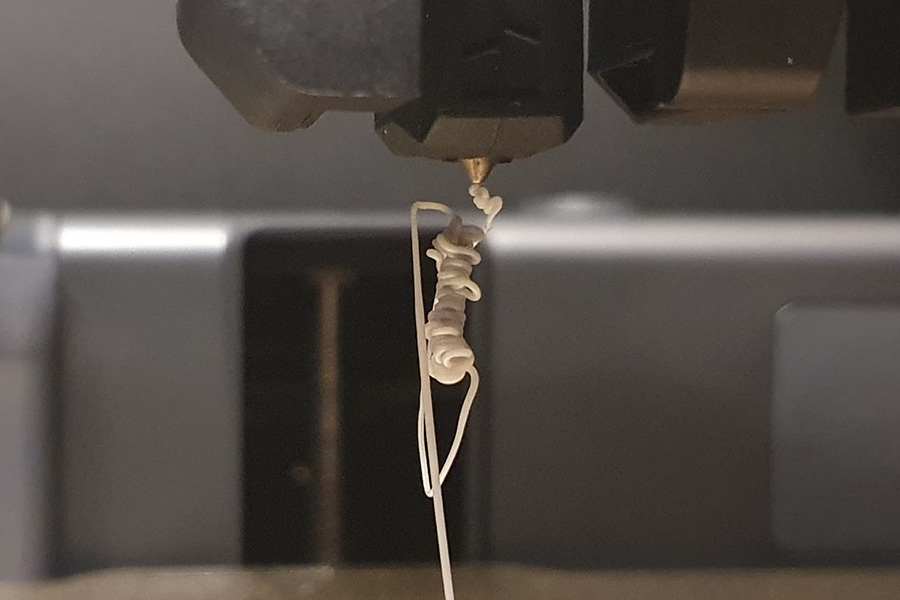
Filament getting caught on the nozzle

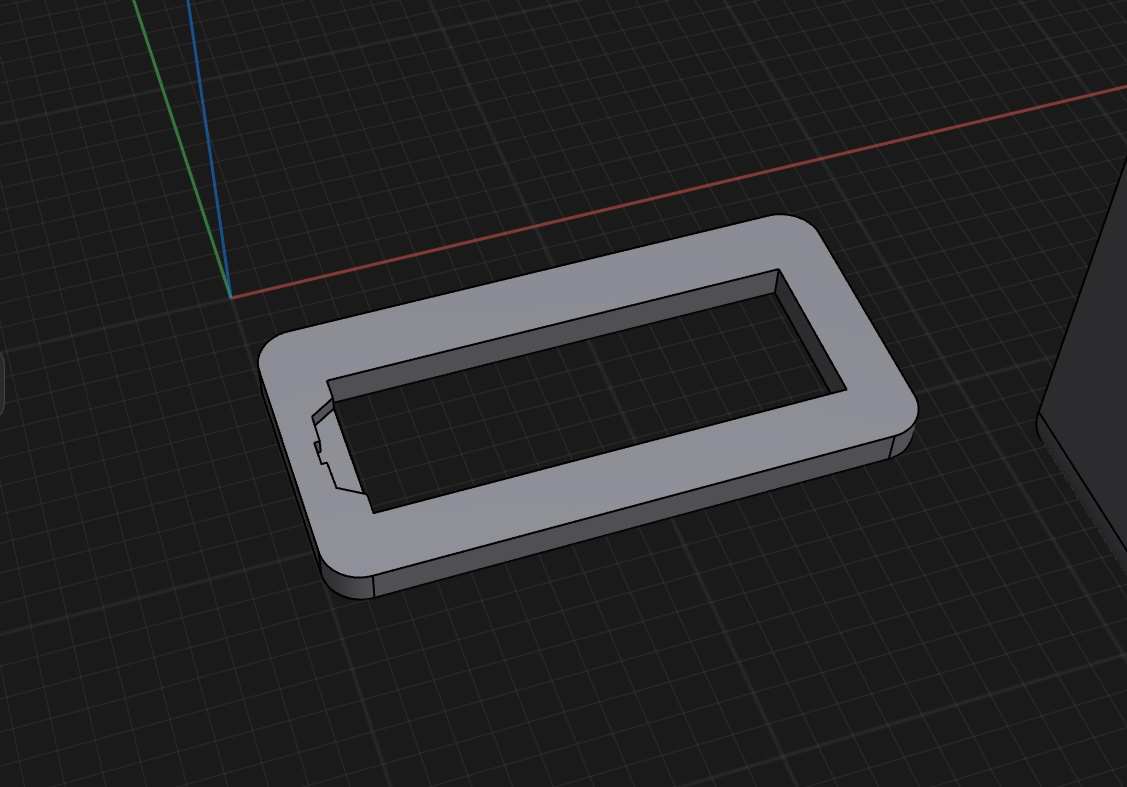
Later, I experimented with 3D modelling for display casings. For the 3.5-inch display casing, I used the Arduino case as a reference for the Arduino section at the bottom, which connects directly to the display.
For the 6x2 LCD display casing, I modelled it myself but relied heavily on an existing Thingiverse model for the size. The LCD display required additional considerations because of the protruding part on its back, which I accounted for in the design.